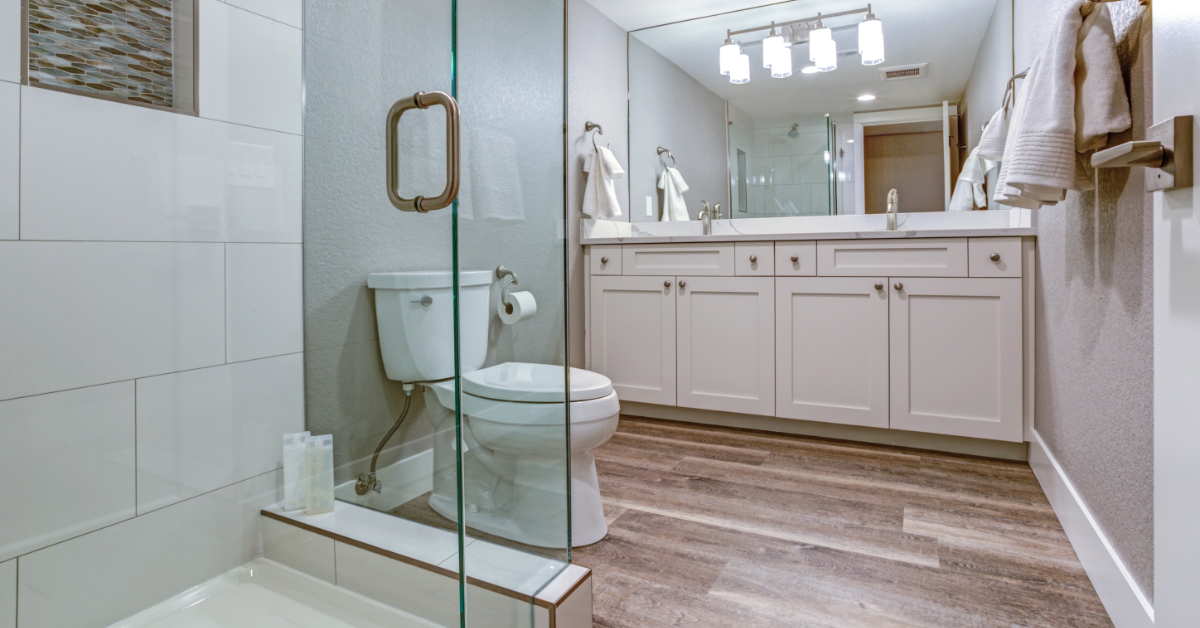
One of the most common questions I hear from aging-in-place DIYers is ‘where do I start?’. If you have the luxury of time and can afford to slowly make upgrades to an aging-in-place home, there’s no right or wrong answer. If, however, your parent is already in need of serious safety upgrades, my advice is to always start in the master bathroom.
That’s because the most dangerous room in the aging-in-place home, by far, is the bathroom. With so much water being used in such a relatively small space, it’s not hard to see why older adults suffer more slips and falls in the bathroom than anywhere else.
If your time or resources are limited, start your aging-in-place home renovation project in the master bathroom and replace the existing floor with a safer, slip-resistant alternative. Beyond giving your aging-in-place home a huge safety boost, this is a relatively inexpensive upgrade. With the right tools and guidance, installing a new bathroom floor is a straightforward DIY project that you can have done in as little as a weekend.
For more help installing slip-resistant bathroom flooring, check out these how-to guides!
Choose Your Flooring Wisely
Step one is to find the right floor. Don’t underestimate the importance of this step. Not all slip-resistant floors are equal there’s a range of price points and styles to consider.
When I’m working on any aging-in-place bathroom floor, nine times out of ten I’m looking for a high-quality vinyl. In a bathroom, water equals danger and slip-resistant vinyl keeps your parent safer for two reasons. One, you’re reducing the likelihood of a slip or fall. Two, you’re reducing your chance of mold and mildew finding their way underneath the tile which can lead to other health and safety issues.
I also like vinyl for bathrooms because the material doesn’t hold water – you can actually find some vinyl listed as ‘waterproof.’ This is a smart flooring option for any bathroom to reduce the chance of water damaging your subfloor and creating a mold and mildew issue.
There are, of course, other flooring options that promise to provide slip-resistance. After vinyl, the next most popular material is slip-resistant tile. Tile can be a great option as well. Vinyl, however, is typically more budget-friendly and easier to install.
There Are Three Main Types of Vinyl to Choose From
Tiles. Vinyl tiles are individual pieces of vinyl, usually square, with an adhesive backing that get applied directly over-top of the existing floor. Floor tiles are the simplest way to install vinyl and usually the least expensive. If budget is the main driver of your bathroom renovation, vinyl tiles can be a good, safe choice for aging-in-place.
Sheets. Sheet vinyl is what it sounds like – a sheet of flooring that gets laid over the top of the existing floor and trimmed to size. Because sheet vinyl is a large sheet without seams, it’s a great option for preventing water damage in the bathroom and kitchen.

Luxury Planks. Vinyl planks are the most popular type of vinyl used in homes when aesthetics is a homeowner’s primary concern. The good news is that they’re also an excellent flooring choice for bathrooms because they create a virtually waterproof seal. High-quality luxury vinyl planks create a floating floor with planks that click and lock together. You also have a ton of styles to choose from, including planks that mimic the look of hardwood. The only downside is that vinyl planks are going to cost you a good bit more than the other two vinyl options.
Here are a few high-quality vinyl planks to help you find the right floor for your aging-in-place bathroom.
When I’m working with my aging-in-place homeowners, I am almost always going to recommend a vinyl plank for the master bathroom. In my experience, it gives you the best of both worlds – a durable, slip-resistant surface and a better overall look.

Diflart Vinyl Plank. This rugged floor has a rigid core to hold up to scuffs and years of use. It also has an underlayment that absorbs shock so standing is much more comfortable for your parent.
Maykke Vinyl Plank. Maykke’s vinyl click and lock planks look like real wood and have a matte finish, making scuffs less visible and adding even more slip-resistance.
Modin Vinyl Plank. These planks from Modin also give an authentic wood look and have an underlayment that makes standing on the floor less painful.
Check out my article, “How to Find Flooring That’s Safe, Inexpensive, and Easy to Install for Aging in Place,” for more safe flooring options for your aging-in-place home.
When you’ve selected a new slip-resistant vinyl plank floor and are ready to get started, follow these steps to make the install easy with results that’ll look like you hired a pro.
How to Install a Vinyl Plank Floor in Your Aging-in-Place Bathroom
Tools & Materials You’ll Need:

- Utility Knife
- Flush Cut Saw
- Measuring Tape
- Rubber Mallet
- Tapping Block
- Short Crow Bar
- Pull Bar
- Carpenter’s Square
- Painter’s Tape
- Knee Pads
- Vinyl Plank Install Kit
Step 1. Remove Any Transition Pieces, Baseboards or Molding

First, you’ll need to expose the entire existing floor that you’ll be laying your new floor over. If you have a transition piece covering the doorway of the bathroom, remove it. You’ll also need to remove the baseboards. If you have crown molding along your walls, all you need to do is remove the thin strip of molding around the perimeter of your floor.
Step 2: Clean the Existing Floor
You can install your vinyl plank floor right over the top of the existing bathroom floor. You can also place it right over the subfloor. Whichever you choose, get the base floor clean and dry before you start your installation.
Step 3: Undercut the Door Jam
There’s a good chance the existing floor fits snugly up against the existing door jam. For most vinyl plank installs, you’re going to have to undercut the door jam just enough so the new vinyl plank can slip underneath.

Pro Tip #1: An easy way to do this is by placing a vinyl plank up against the door jam and using it as a spacer for your cut. Lay the flush-cut saw on top of the plank and make your cut where the saw hits the door jam. This is a quick and easy way to make sure you’re undercutting the door jam to the proper height.
Step 4: Place Spacers Around the Baseboards
Vinyl plank flooring is meant to be a floating floor. Therefore, the planks need to stay ¼-inch off each wall. Vinyl flooring installation kits should come with wedge spacers that you can secure to the wall with painter’s tape to keep each plank far enough out from the wall.

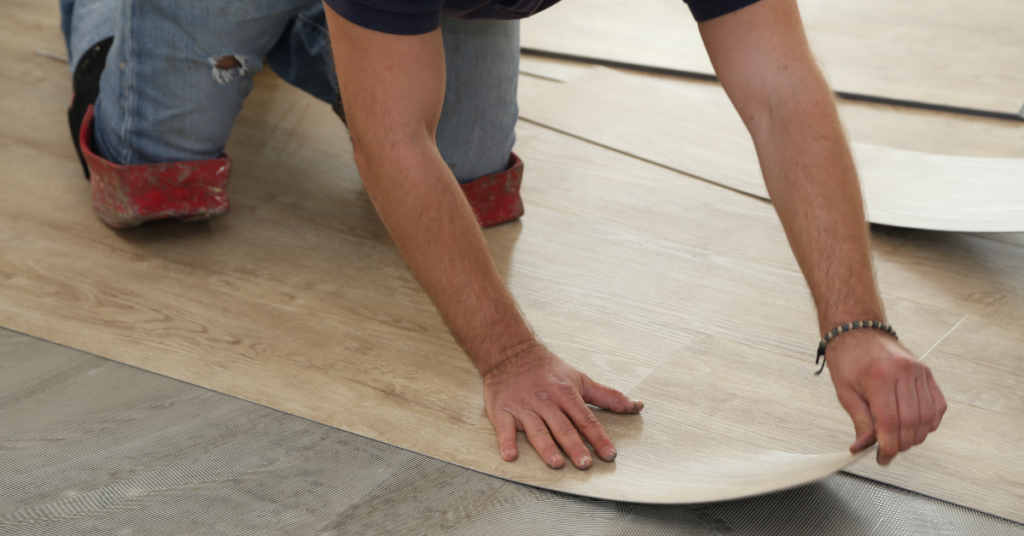
Step 5: Lay Your First Plank
Now you’re ready to lay your first plank. In most bathrooms, you’ll want to start along the wall that backs up against the entry door. That’s because you’ll need that first plank to slide under the door jam you just notched out. Start here and lay the first plank.
Step 6: Continue Laying Each Plank Along the First Wall
Once your first plank is in place, take your second plank and match the tongue and groove to fasten plank two into place. Once you manually connect the planks, place a tapping block over the seam and gently tap with a rubber mallet so you know the planks are firmly connected.
Repeat this process until you approach the end of the first row. You’ll have to trim the final plank in the row to make it fit the remaining space. To trim the plank to size, measure the length you need and mark the plank Then use your utility knife and a straight edge and score the plank along the cut line. After a couple of swipes of the utility knife, you should be able to snap the plank to size.

Pro Tip #2: When you score and snap your planks, don’t be surprised to see a few jagged edges. They don’t always break cleanly. Do yourself a favor and have a hand saw at the ready to trim up any rough plank edges as you go.
Finish the first row by laying your final board in place. Remember that the end of the board should sit ¼-inch off the wall.
To finish and ensure your boards are tightly connected, hook a pull bar onto the end of the final plank between it and the wall. You’ll want to tap the other end of the pull bar with a rubber mallet. This will pull the final plank into place, making sure you have a nice fit.
Step 7: Install the Second Row
Plank floors – whether you’re talking about vinyl or wood or any other materials – should be installed by staggering the seams. You want a fairly random seam pattern so the floor looks as natural as possible.
The second row of your plank floor is where your seams come into play. Start your second row by cutting your first plank in half. You can score and snap the plank just as you did in the last step. One of the halves will be the first plank you lay down for row two. Then, lay the down and use your rubber mallet to tap and secure it in place against the plank in row one.
From here on out, tap each new plank into the plank that came before it and the row of planks above it.
Pro Tip #3: When you buy a plank kit with vinyl that mimics the look of hardwood, the kit usually only comes with a few plank patterns, meaning that a lot of your boards are going to look exactly the same. My pro tip to you is to organize your boards by pattern before you start and alternate the boards you lay so you don’t place two or three boards with the exact pattern one after the other. A random pattern will give your floor a more authentic look.
Step 8: Keep Going with Your Install
Continue laying each plank and tapping it into place until you have the full bathroom covered. You’re going to run into corners and sections that require a smaller piece of vinyl which is to be expected. Just continue to score and cut sections of plank to size to fit each space.
Most DIYers quickly learn how to cut planks to the proper size. The space around the toilet, though, can get a little tricky so let’s go over this part of the process in detail.
Installing Vinyl Planks Around the Toilet
One of the reasons that installing a floor in a bathroom intimidates some DIYers is the toilet and its plumbing that sits on the floor. You’ll need to account for this as you plan your layout, but don’t worry – the process is pretty straightforward and you’ll have mastered after the job is done.
Step 1. Remove the Toilet
You want a clean line of flooring going underneath your toilet and any other fixtures that sit on the floor of your master bathroom. To get your new flooring properly installed around the toilet, you’re going to need to get underneath of it.
First, before you do anything, turn off the water to the house. Next, disconnect the toilet. Do this by turning the connection pipes lose at the back of the toilet. Then, lift the toilet and move it away from your workspace. You’ll be left with the toilet flange and pipe sitting slightly above the floor.
Step 2: Lay Your Plank Near the Toilet Flange
The process of installing flooring around the toilet starts by installing your vinyl plank down the way you would if the flange wasn’t there. A portion of the plank will cover the flange – that’s okay for now! Use your tapping block and rubber mallet to tap the plank into place.
Next, cut the plank so it fits around the flange. To do this, take your utility knife and carefully score the floor to remove the part that covers the flange. Then, once you snap off the section you scored, the remaining plank should fall into place around the flange.
Repeat this step as you continue to lay each plank in place around the flange. It may take a couple of scores to get the plank to properly fit.
It’s as easy as that! Remember that the toilet is going to cover a portion of the floor you installed, so you have some room for error if your cut-out isn’t perfect.
Step 3: Reinstall the Toilet
Place the toilet back into place, turn your water back on, and you’re set.
You’re Ready to Get to Work
Installing a slip-resistant master bathroom floor for your aging-in-place home is easier than most DIYers think. This project will give your aging-in-place home a big safety boost, and it won’t send your budget skyrocketing.
As you shop for the right slip-resistant vinyl planks for your aging-in-place home and start your installation, send me any questions you have along the way using the comments section below. I’m here to help!
Good luck with your next aging-in-place home project.