Creating a home where your parents can safely age in place is an amazing gift to give them. I promise you that doing the work yourself will result in an incredible feeling of achievement.
But, that doesn’t mean you won’t make some mistakes along the way…probably a lot of them.
And, that’s okay. That’s why I’ve set out to help DIYers do the work of creating safe aging-in-place homes for their loved ones.
For years, I’ve given DIYers tips for making safety upgrades throughout their home. And now, I’m helping them fix their mistakes, too.
In my new series, ‘Common Mistakes’, I’ll show you how to undo your work … or the work of another fellow DIYer … and fix what’s broken so your parent can safely age in place.
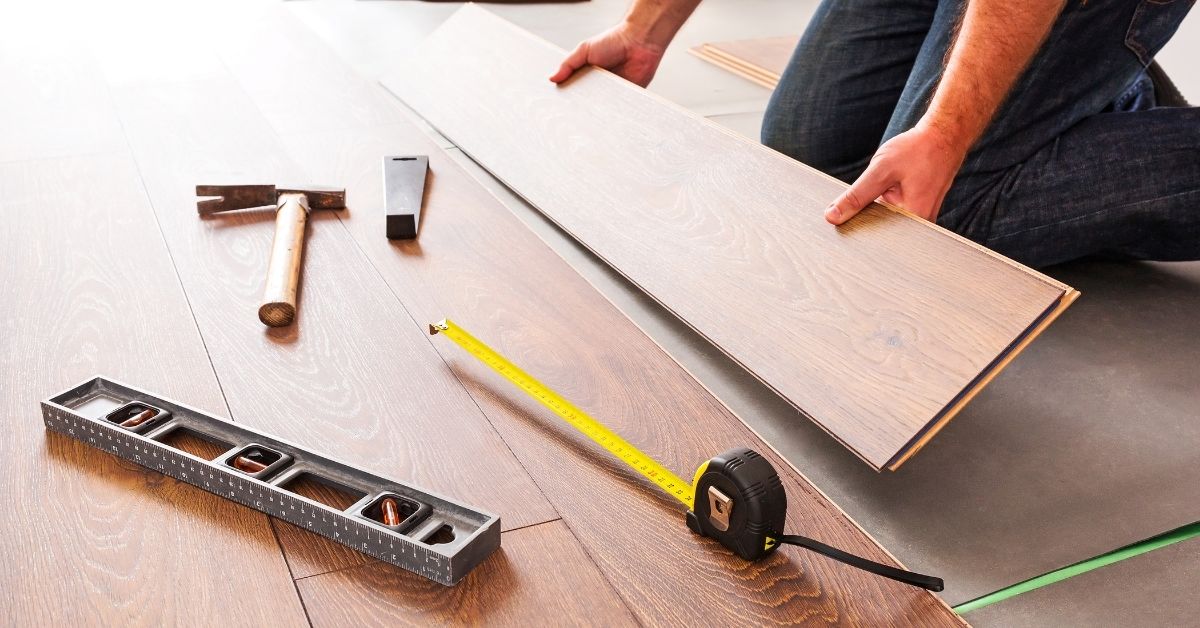
For more help with kitchen floor installation, check out these guide books!
First up – Common Mistakes: Kitchen Flooring Installations Gone Wrong…and How to Fix Them
In this article, I’m focusing on fixes to a vinyl kitchen floor installation. Vinyl is the flooring I recommend most often to aging-in-place DIYers because it’s slip-resistant and easy-to-install.
You can dig into another article I wrote about vinyl for aging in place to learn more about why I choose it for my renovations: “How to Find Flooring That’s Safe, Inexpensive, and Easy-to-Install for Aging in Place.”
There are three common vinyl kitchen flooring installation mistakes that I see the most. Here’s a breakdown of what to look for and everything you need to know to make each fix.
Common Mistake #1: Not Leveling the Subfloor Before Installing Your Vinyl Kitchen Floor
This mistake is number one for a reason. The most common mistake I see from a DIY vinyl kitchen floor installation is placing the new vinyl floor overtop of an unlevel subfloor.
A subfloor that’s out of level creates all kinds of issues for the aging-in-place kitchen.
Those dips in the floor will cause your vinyl planks to click and shift when you walk over the uneven portion. If your parent has any balance issue whatsoever, a loose or shifting floor is a big problem.
If your parent is treading on an uneven kitchen floor, I highly recommend you tend to this fix fast. Here’s what to do next.
Pro Tip: Taking up your existing vinyl floor is possible with floating vinyl planks. These planks are floating over the floor and not glued down. If your floor is attached to the subfloor with an adhesive, however, you won’t be able to reinstall the vinyl once it’s removed. So, don’t start ripping up the floor until you’re ready to invest in a new one.
How to Level a Subfloor
Tools and Materials:
- Long Bubble Level
- Pencil
- Floor Patch Pre-Mixed
- Scraper
- Rubber Mallet
- Measuring Tape
- Utility Knife
- Miter Saw
Step 1: Remove the Vinyl Planks

If your planks run under the baseboards, you’ll first remove the baseboards from the wall. Run a utility knife along the top seam of the board and use a pry bar to work the board away from the wall.
Next, remove each row of planks one-by-one. Go slow and be careful not to force the planks apart if you’re going to reinstall them after your subfloor is level.
Step 2: Use a Bubble Level to Find Each Dip in the Floor
Place a long bubble level on the floor where you notice the dip. Move one end up to a level position so you can see how deep of a dip you need to fill.
Pro Tip: Don’t assume that the dip you noticed is the only section of the subfloor that’s out of level. Go around the room with your level and check the floor thoroughly. Mark every section that’s out of level.
Step 3: Spread Floor Patch Across Each Out-of-Level Section of Subfloor

Using your scraper, spread the floor patch across the floor to bring it up to level. Check your progress with your bubble level often and follow the manufacturer’s instructions to make sure the patch dries fully and is ready when you go to reinstall your vinyl floor.
Step 4: Re-install Your Vinyl Plank Floor
Now, you’re ready to retrace your steps and put your floor planks back into place. Start by placing spacers around the edges of the wall.
Then, lay your first plank, starting at the door jam. This will allow you to get that first plank under the door jam and create a seamless transition.

Lay your second plank ahead of the first, matching the tongue and groove to marry the two planks in place. Once they’re aligned, use your rubber mallet to gently tap the seam to make sure they’re firmly connected. Repeat this until you come to the end of the first row.
Chances are that the final plank in each row will need to be trimmed to fit in place. Some planks can be scored and snapped. Others require a miter saw. However, you cut your planks, mark your cut line and cut the plank to size.
The last board in each row should sit ¼-inch off the wall which your spacers should make happen.
Then, move on to row two. Now, you’ll be connecting each plank to the one in back of it as well as securing it to the adjacent row.
Pro Tip: Plan ahead if you’re installing planks around a kitchen island. You’ll need to plan your cuts to maintain a staggered joint pattern as you make your way around.
Keep on going, following this process until you’ve laid the vinyl planks across the entire floor.
Pro Tip: If you’re fixing your existing vinyl floor as a part of a larger kitchen remodel, do not install your new vinyl under your cabinets. The vinyl plank floor needs to stay floating so it can expand and contract, while cabinets need to be secured to the floor. In this scenario, install your cabinets first then finish your flooring install.
For an even more detailed breakdown of a vinyl floor installation, read through my article “How to Install Slip-Resistant Flooring for Your Aging-in-Place Home.” In it, I walk you step-by-step through a vinyl plank floor installation that will help you install any vinyl plank floor in your aging-in-place home.
Common Mistake #2: Not Undercutting the Door Jams or Setting Planks Behind the Baseboards
I respect every aging-in-place DIYer I meet. They’re always willing to work hard and invest serious sweat equity into their parent’s home. With that in mind, I can also tell you that I’ve seen a lot of aging-in-place DIYers make mistakes by cutting corners to save time. And, one of those mistakes is failing to set vinyl plank floors under the baseboards and door jams.
Taking these extra steps does take more time. But, taking the easier route doesn’t look nearly as nice and, in some cases, can look like a job very poorly done.
Unfortunately, this fix does require a full floor re-installation. That’s because of the click and snap system of the vinyl planks. In most cases, the last plank in each row is cut to size, and you can’t connect an extra piece of vinyl to the end of a plank that’s already been cut.
The same goes for the floor next to the door jam. You’ll be cutting the door jam to size and adding a newly cut plank.
How to Reinstall Vinyl Planks and Get Them Set Under Baseboards and the Door Jam
Tools and Materials
- Utility Knife
- Pry Bar
- Multi-Tool
- Rubber Mallet
- Miter Saw
- Vinyl Floor Spacers
- Measuring Tape
- Matching Vinyl Planks
Step 1: Remove the Baseboards
Take your utility knife and cut along the edge where the baseboard meets the wall. This will loosen the board from the wall, allowing you to then take your pry bar and carefully wedge the board free.
Step 2: Pull Up Each Row of Vinyl
One row at a time, unclick and separate the vinyl planks.
Keep each row of planks together and separated from the rest. While, yes, you are reinstalling the floor, you’ll also be able to reuse many of the rows you already created.
Step 3: Place Your Spacers
Your vinyl floor is going to expand when it’s warm and contract when it’s cold. Like I described earlier, you’ll need to account for this shift by placing the end of each vinyl plank row at least ¼-inch off each wall. Use floor spacers to make sure the end of each row of planks is set at the proper distance.
Step 3: Cut the New Planks to Size
Determine the space you need to add to the ends of each row of planks.
Pro Tip: The easiest way to recreate your vinyl plank kitchen floor is to cut the first plank in each row by a few inches. This maintains the staggered plank look among each row. More importantly, it shifts every row back a few inches, allowing you to replace the last plank in each row with a freshly-cut plank sized to fit under the baseboard.

Figure out how much you need to cut off of the first plank in each row and how long of a plank you’ll need to add to the end of each row. Mark the cut line on the first and last plank. Then, using your miter saw, make your cut.
Repeat that process, row by row, until each series of planks is cut to fit under the baseboards.
Step 4: Replace Your Baseboards
Set the baseboards back and nail them into place.
Step 5: Undercut the Door Jam
Now, it’s on to the door jam. If your existing floor sits flush against the door jam, use the top of the floor to make your cut mark. You’re going to cut into the wood jam to make space for the flooring that you’ll fit underneath for a seamless look.
If your floor was previously installed by cutting the floor out around the door jam, you’ll have to remove the caulk that sealed that gap, along with the piece of flooring that was originally cut.
Step 6: Cut a New Plank to Fit Under the Door Jam
Depending on where the next adjacent floor plank and seam are located, you may need to replace a bigger section of the floor to get the new plank to fit underneath. Or, you may get away with sliding a piece of scrap floor under the jam and connecting it to the existing floor.
Determine the length you need, mark your cut line and cut the new plank with your miter saw. Then, slide the piece under the door jam and tap it into place flush with the existing floor plank using a rubber mallet.
Common Mistake #3: Not Allowing for Enough ‘Open Time’ for the Adhesive
Open time refers to the amount of time between when you lay the vinyl adhesive on the subfloor and when you place the sheet vinyl on top. You should be able to look at the adhesive container for instructions on how to apply it. It’s very important you follow those instructions to the letter – including the necessary open time.
Why? Laying sheet vinyl down too soon is a great way to get your kitchen floor to bubble. If you’ve ever walked on a sheet vinyl floor and noticed air pockets underneath, that’s what you’re trying to avoid.
Not allowing for enough open time is a common DIY kitchen floor installation mistake. But, the fix isn’t that hard and definitely a do-it-yourself project, even if you’re a DIY novice.
How to Fix Bubbles in Your Sheet Vinyl Kitchen Floor
Tools and Materials
- Strong Needle
- Iron
- Cloth
- Heavy Book, Box, or Object to Sit Over the Bubble
Step 1: Puncture the Bubble with a Needle
Insert your needle at the center of the bubble, pushing it through the entire layer of vinyl so the air underneath can escape. Then, remove the needle.

Step 2: Iron the Bubble
Place a cloth or old towel over the entire bubble. Then, use a warm iron on a medium setting to iron the towel and bubble underneath. Keep doing this until the bubble flattens.
Step 3: Add Weight
Once the bubble is deflated, stack up a heavy pile of books or boxes on top for at least 24 hours. You want the floor to harden again in a flat position.
You’re Ready to Make these Fixes and Move On
Now that you know what to do…and what not to do…during your kitchen vinyl floor installation, you’re ready to fix your floor and move on to your next aging-in-place remodeling project.
If you have questions along the way, use the comments section below.
Good luck with your aging-in-place kitchen flooring fix…and your next aging-in-place home project!