As we age, our eyes start to play tricks on us. It gets harder to see clearly, especially in low-lit rooms and this is compounded further by our reduced ability to define contrast in low light. You can imagine the dangers of an older adult trying to navigate a dark home. It’s a perfect recipe for accidents, trips, and falls.
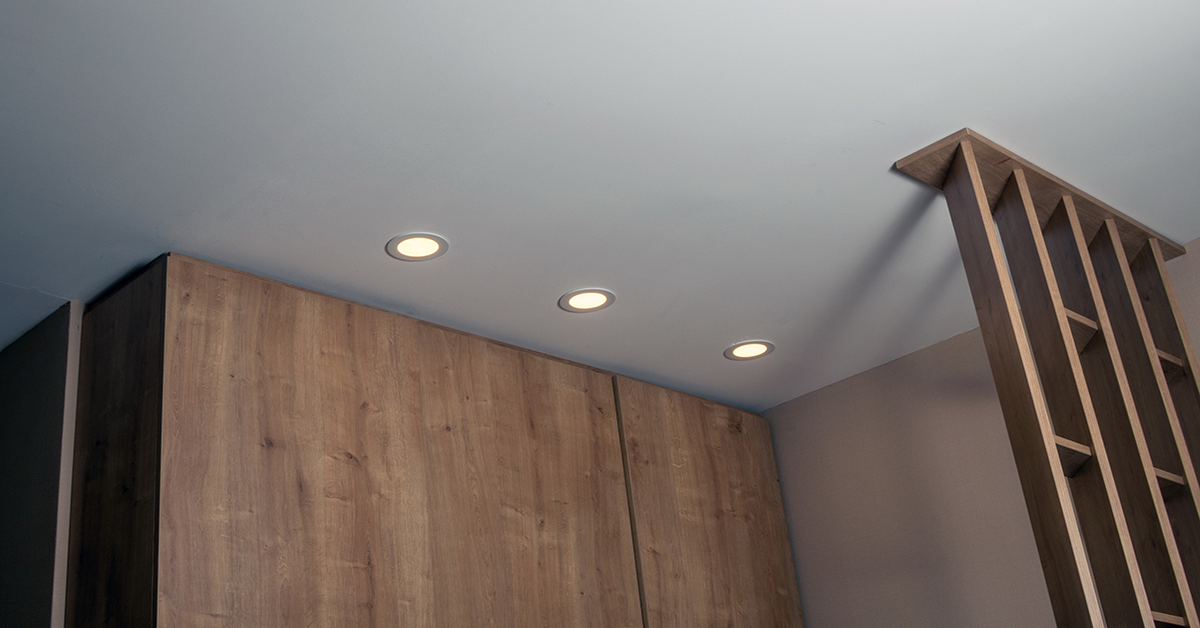
A big focus of your aging-in-place remodel should be adding quality light to your home. Because floor lamps add one more tripping hazard to the floor, recessed lighting has gained popularity for aging in place. By adding recessed lighting, you can illuminate those poorly lit areas where trips and falls are more likely to occur.
Two Ways to Approach Recessed Lighting in the Aging-in-Place Home
There are two types of general lighting in every home: ambient light and task light. Recessed lights can help you add both to a dark home.
- Ambient Light. Ambient light adds brightness to an entire room. Mounted overhead, this type of recessed lighting casts light over a wide area. This can be enhanced even further by adding several recessed ceiling lights together on a shared circuit that serves as the main light source in a room.
- Task Light. These concentrated recessed lights are for exactly what the name suggests: tasks. If you think about your home as a series of work stations, recessed task lighting can brighten up dark areas like over a kitchen island, bathroom sink or office desk. The focused light that you gain through recessed task lighting helps make that specific space a lot safer.
For more tasking lighting ideas, check out my recent article, The Best Task Lights for Aging in Place.
The Best Places to Add Recessed Lighting for Aging-in-Place
Make the most of recessed lights by adding them to these areas of your aging-in-place home.
Kitchen
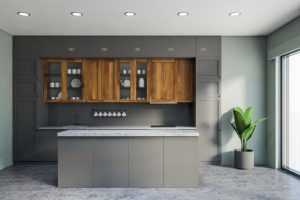
Recessed lights over a counter or island are one of the best ways to brighten up a dark or shadowy kitchen. A good set will give you plenty of light to cut meat and vegetables safely. When you add a series of recessed lights across the kitchen ceiling, you’ll add a ton of ambient light, too, so everything from seeing a pot of water boil to noticing water spilled on the floor gets much easier.
Bathroom

Recessed task lighting is great for over the top of the shower, around the tub, and above the sink. With the bathroom being one of the most dangerous rooms in the home for an older adult, make sure you have plenty of light to see things clearly. You can add recessed light across the entire ceiling or focus on adding light directly over the main fixtures.
Hallway
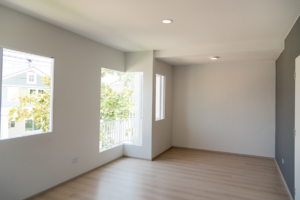
It’s difficult to properly light a hallway mainly because of the absence of windows and limited space for traditional lighting. A series of recessed lights will be a huge help in reducing tripping accidents and pretty much any other obstacle that may present a hazard.
Bedroom

There are several areas in a bedroom where recessed lights can help increase aging-in-place safety. Focus on adding lights above your parent’s bed so they can read in bed comfortably and avoid eye strain. Recessed lights are also helpful to install in walk-in closets so there’s no tripping over clutter, and overtop of dressers so it’s easy to see what’s in each drawer.
My 5 Favorite Easy-to-Install Recessed Lights for Aging in Place
Take a look at my picks for the five best, easy-to-install recessed light kits out there right now.
Pro Tip: LED is the new master of lighting, and for good reason. The bulbs just about last forever and they draw less power than traditional bulbs. The added benefit of LED lighting is that you don’t need to worry as much about fire hazards because they produce significantly less heat than incandescent bulbs. They’re also usually smaller, weigh less, and don’t require as much room inside your ceiling to install. For all of these reasons, I only use LED recessed lights in my aging-in-place remodels.
Bbounder Ultra-Thin Recessed Lights

If you have a large room that needs a lot of added ambient light, this 12-pack of ultra-thin LED recessed lights has you completely covered. They’re easy-to-install and can make for a good DIY project if you have experience with electrical work. I like that these lights are dimmable. With older eyes needing a lot of light, this light kit can really brighten up a room, but the dimmer capability lets your parent control the brightness and customize the light however they wish.
Torchstar Elite Series Slim Recessed Lights

This kit from Torchstar is a 6-light kit that’s a good option for mid-sized rooms. These lights install easily. Each light fixture produces a ton of light and only requires two inches of ceiling space above their mounting point. And, they’re dimmable as well.
Ensenior Cool White Recessed Lights

Another good option is the Ensenior 6-inch ultra-thin LED kit. These are great lights for a ton of reasons. First, they’re lightweight which is helpful when you’re installing anything in the ceiling. They have ‘Daylight’, ‘Cool White’, and ‘Warm White’ color options. The cool light setting is a big plus. That’s because our eyes yellow as we age. The cool light will help balance our vision so objects look less yellow.
Ostwin Low-Profile Recessed Light

If 6-inch lights are too wide for your room, or if you just like the small light look, 3-inch lights might be a better option. Take a look at these 3-inch recessed lights from Ostwin. They’re dimmable with energy-efficient LEDs and warm and cool light settings – all perfect features for the aging-in-place home.
Luxrite Square Ultra-Thin Recessed Light

Circular recessed lights are by far the most popular style in today’s homes, but there are also square lights out there that work well. Which type you choose is simply a matter of preference. If square lights are what you’re looking for, these 3-inch recessed lights from Luxrite are a great choice. They’re pretty perfect for aging in place for several reasons – they’re dimmable, come with cool light options, are energy-efficient, and are easy-to-install.
Here’s How to Complete a Simple Recessed Lighting Install
Once you’ve chosen which of these recessed lights works best and know where you’ll be placing them, it’s time for the installation. If you’re only adding one or two lights and installing them somewhere with easy access to the wiring in your ceiling, then this is a great DIY project with moderate skill-level required.

However, if you’re looking at installing your lights in an area with limited access to wiring, or if you need to reroute wires, it’s time to call a professional contractor. When an aging-in-place home project requires electrical work, be honest with yourself about your skill level. If you’re new to DIY home design and renovation, or if it’s just been a while since you completed a simple electrical project, don’t be a hero. Invest in your safety and bring in a professional.
When you’re ready to get started with a simple recessed lighting installation, here’s what you need to know.
Tools and Materials You’ll Need:
Step 1: Turn Off the Power
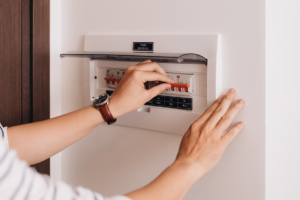
Step number one in every electrical project is to kill the power! Go to your breaker box and throw the switch that powers the room you’re working in. If you’re looking to retrofit an existing overhead light, this is easy to identify and isolate. But when in doubt, throw the main breaker to the entire house.
Step 2: Locate the Ceiling Joists

For a new install, you want to find the overhead ceiling joists. A stud finder will speed this up and keep you from making swiss cheese out of your ceiling with a drill. Joists are usually installed either 16 or 24-inches on center, which means they’re about 16 or 24 inches apart. Locate the first joist and the others will be easy to find with the stud finder. One trick is to go up into the attic and note the direction and spacing of the joists. This step is critical to avoid drilling into the joists later on.
Step 3: Cut Out the Holes in the Ceiling for Each Light
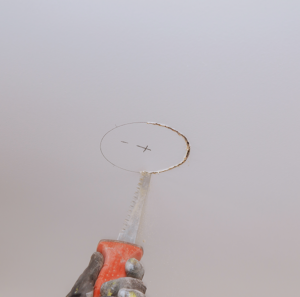
Most lights come with a paper template that will allow you to determine the proper location to mount the light. Once you mock up the location, double-check that there isn’t a joist nearby. Mark the center of the intended hole and drill a pilot hole. Next, use a ceiling saw to cut out the circle for the light fixture. If you’re retrofitting an existing light, you might have to open the size of the hole after removing the old light.
Step 4: Connect Each Wire and Set Up the Junction Box
Your recessed lights should come with a junction box. This box will house all of your wires once the lights are installed. This is also the place where you’ll connect your home’s ground wire to the light’s ground wire to complete the connection.
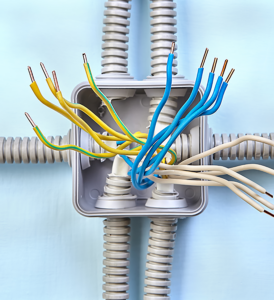
Refer to the manufacturer’s instructions to make sure you’re installing your specific lights correctly. Typically, the process of wiring up the lights and setting up in the junction box is pretty simple. Your light will most likely have three wires. You should see a copper ground wire and two conductor wires. Find the ground wire from your electrical source and twist the two ground wires together, placing a wire cap over top to secure the connection. If your lights come with plastic UL-Certification connectors, you can use those too.
Then, connect your conductor wires, matching black to black, green to green, or whichever colors your particular wires happen to be. Finally, carefully tuck each connected wire into the junction box and secure the lid onto the box. The junction box should fit inside the ceiling. Place it out of the way but without stretching the wires too far from the light.
Pro Tip: If you get to this step and have second thoughts on handling the electric yourself, stop and contact a contractor. This step is not a point of no return – you can always call in professional assistance to finish a job you’ve started.
Step 5: Install the Light
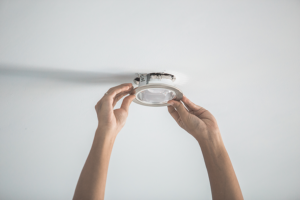
Once the wires are connected, refer to the manufacturer’s instructions for how to install your specific light. For a typical recessed light installation, the next step is to place the recessed light into the ceiling and secure it in place with either clips, screws, or in whatever way the instructions specify.
Step 6: Light Up the Room
All that’s left to do is turn on your new recessed lights and brighten up the room. Turn the breaker back on so electricity starts flowing again and turn the lights on. That’s all there is to it.
Once You Add a Few Recessed Lights You’ll Be Tempted to Install Then in Every Room of Your Aging-in-Place Home
Take this weekend and install a set of recessed lights in your parent’s kitchen or hallway and see the immediate difference they make in your aging-in-place home. When you’re ready to get started, grab one of the recessed light kits on my favorite’s list and get to work. Use the comments section below to send me any questions as you go. I’m here and ready to help you every step of the way.
Good luck with your next aging-in-place home project!