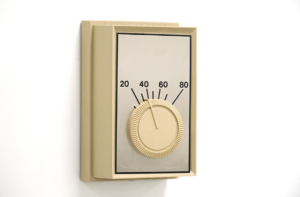
Decades ago, thermostats were clunky boxes controlled by a mercury switch. They hung on the wall in just about every room in the house, and they were certainly nothing to look at. The thermostats I used growing up were always difficult to control and hard to read – even for young eyes.
 You can imagine the discomfort that an outdated thermostat can cause old, tired eyes and sore hands. If your aging-in-place home is still operating with old-time thermostats, it’s time for a change. Luckily, technology has come a long way and we now have high-quality, easy-to-read digital models available that are perfect for the aging-in-place home.
Here’s What to Look for in an Aging-in-Place Thermostat
To be considered safe for aging in place, your thermostat needs to include two primary features.
- Easy-to-Read Numbers
- Easy-to-Push Buttons or Voice-Activated Controls
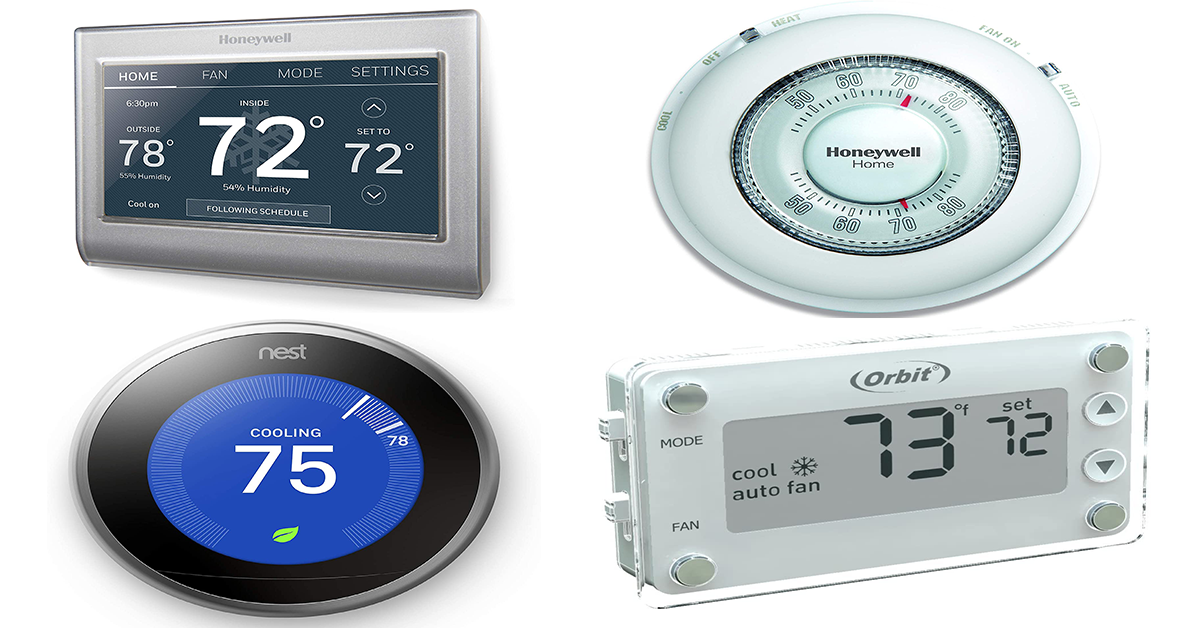
At a minimum, a thermostat needs to be easy-to-read and painless to control if it’s going to make the cut for aging-in-place. Here are my top picks for the best thermostats that make the grade and then some.
Best Manual Thermostats
Manual thermostats are usually the simplistic types of thermostats you can buy. If your parent is hesitant about inviting smart technology into their home, an easy-to-read manual thermostat should be all they need to read and change the temperature safely.
It won’t take you long to notice that quite a few Honeywell thermostats made my list of favorites. Why Honeywell? Well, the company introduced the first programmable thermostat in 1906 and they’ve been making high-quality thermostats ever since. You can find other thermostats out there that will get the job done. But, when it comes to my aging-in-place remodels, I place a lot of value on products that give me peace-of-mind. I trust Honeywell thermostats to always perform well and make life easier for aging adults.
Honeywell Deluxe Manual Thermostat

Orbit Clear Comfort Thermostat

Honeywell Large Round Manual Thermostat

If your parent wants to keep things simple, this classic thermostat design from Honeywell is a great option. It’s a slightly-oversized thermostat with large, easy-to-read numbers. Its large dial turns easily and painlessly as well.
Honeywell Digital Non-Programmable Thermostat

If you can’t tell by now, Honeywell is one of my go-to thermostat manufacturers. This is another great model. It’s more modern and sleek than the first two, but equally as straightforward. Featuring a larger screen and an easy-to-read display, this thermostat is a great choice for those looking to keep things basic but gain some modern touches.
Best Smart Thermostats
There are so many excellent smart thermostats to choose from, many with features most of us wouldn’t have imagined twenty years ago. Each of the smart thermostats on my list is compatible with a smart speaker, which is key. I love smart tech for aging-in-place because of the incredible safety and comfort that it brings to older adults. With any of these thermostats, your parent can stay right where they are and control the temperature in any room in the home with just their voice.
These are my favorite touch-free, smart thermostats for creating a safer aging-in-place home for your parent.
Honeywell Home T9 Smart Thermostat

Google Nest Learning Thermostat

Honeywell Home WiFi Smart Color Smart Thermostat

How to Install Your New Aging-in-Place Thermostat
While thermostat technology has drastically changed in the last few years, they all function similarly to the older units many of us grew up with. Any of the thermostats on my list should be easy to install. The biggest consideration you need to make before you get started is your own comfort level with electrical work. If you’re a DIY novice with little to no electrical experience under your belt, your best bet is to consult with and hire a professional contractor.
If you have the knowledge and experience to tackle a basic electrical project, here’s what you’ll need.
Tools and Materials:
Step 1: Turn Off the Power
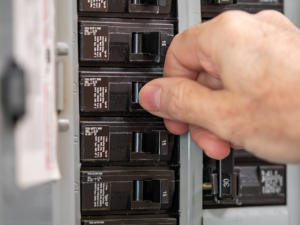 Whenever you’re working with electricity, turn off power in the room you’re working in. Then, take your multimeter and double and triple-check that there is no voltage running through the wires. If you aren’t sure which breaker controls the thermostat, just turn off the main breaker. Don’t worry about the food in the fridge – this job won’t take long.
Step 2: Remove the Old Thermostat
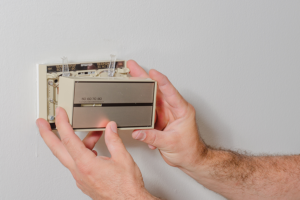 Next, you need to remove the old thermostat from the wall. Most older thermostats have a faceplate overtop of the screws that hold the main body to the wall. Remove the faceplate to access the screws. Unscrew any additional layers under the faceplate until you see four thin wires – and “R” wire (Red), a “G” wire (Green), a “W” wire (White) and a “Y” wire (Yellow).
Pro Tip: Do yourself a favor and snap a picture with your phone of this wire set up before proceeding. This can help you when you go to install your new thermostat or troubleshoot along the way.
If you remove the faceplate and see a heavier gauge wire behind the thermostat, like household conduit or anything other than the four-wire set-up I described – STOP. This could be a high-voltage set-up. If so, this is absolutely a time to call in a professional.
Step 3: Detach the Wires from the Old Thermostat
You should see small indicator markings on the thermostat next to each contact that a wire is screwed into. The “R” indicates the red wire, “Y” for yellow wire, etc. These indicate which contact point receives which color wire. Here is the important part. It’s entirely possible that whoever initially set up the electrical run didn’t follow the color-coded format on one end or the other, meaning the colored wires don’t match the indicator markings. This is where the picture you took of your wire set up is going to come in handy.
 If the colors match, you’re in good shape. If the colors don’t match, you have a bit more work to do. Before you can move on, you need to mark each wire contact point so you know which colored wire goes where during your new thermostat installation. If you’re unable to take a photo or would rather mark the contact points directly, you can do so with small pieces of painter’s tape. Do this before detaching the wires.
Once marked, detach the wires by removing each individual screw holding the wires to the plate.
Pro Tip: After you remove the wires, give them a little tug to see how much slack you have to work with. If the wires are short and don’t detract much from the wall when you gently pull on them, you might risk losing them inside the wall. To be safe, gather the wires into a single cluster and tie them together with a piece of string. Then, tape the string to the wall to keep the wires from slipping back into their hole.
Step 4: Remove the Plate from the Wall
Next, it’s time to remove the thermostat plate. Remove the actor screws holding the plate to the wall.

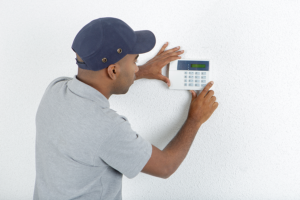
Step 5: Install the New Mounting Plate
Now you’re ready to install the new mounting plate and get the new thermostat onto the wall. Thermostats have gotten larger over time, so your new thermostat is most likely going to be larger than the one you’re replacing. This is usually good news – the new thermostat should completely cover the existing hole so you’re not stuck patching old screw holes in the drywall.

Step 6: Connect the Wires
Next, you’ll need to attach each wire to its indicated mounting location. “R” for “R”, “W for “W”, etc. You may need to straighten the wires to fit into the new mount location with a pair of pliers. Secure each wire into the matching mount location and tighten down the screws.
Pro Tip: Some newer thermostats have separate mounting locations for the wires depending on which type of heating system you have installed in your house. Make sure you read and follow the instructions included with the new unit.
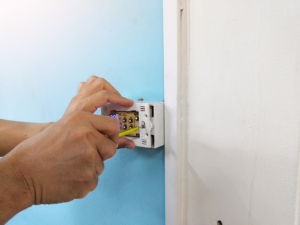
Step 7: Add the Batteries
 Install any batteries that came with the thermostat. Then, look to see if there’s a switch present on the back of the unit. The switch will have two settings that indicate the type of heating system you use – gas/oil or electric/heat pump. Switch the button to the side that matches your setup.
Step 8: Fire It Up
Attach the thermostat to the mounting plate. Then, flip the breaker back on and you should be ready to go.
Time to Get Started
Now you’re ready to find the best easy-to-read thermostat for your parent’s aging-in-place home – and get it up and running safely. As you plan out this project, use the comments section below to send me any questions you have along the way.
Good luck with your next aging-in-place home project!