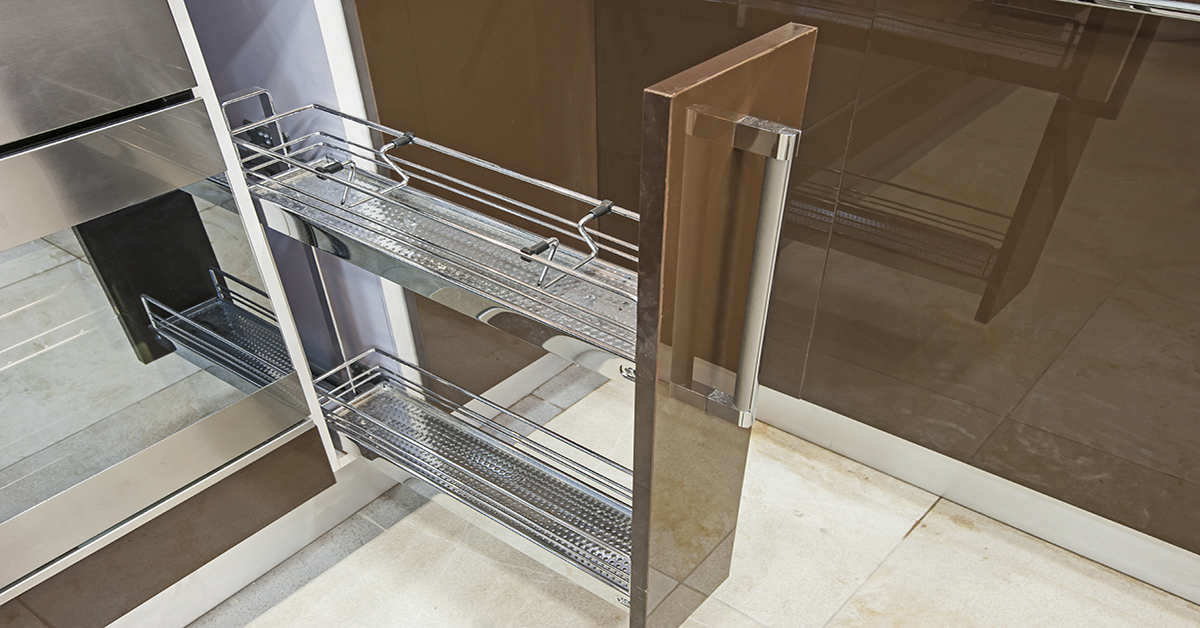
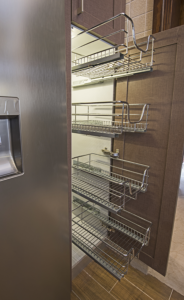
Anyone who’s lived with a deep pantry knows the struggle of losing cans and boxes to the back of the cabinet, never to be seen again. Pull out pantries are a great addition to any kitchen. They let you see everything and keep it all within reach.
For an aging-in-place kitchen, I consider pull out pantries to be an absolute must. I install pull outs in every one of my aging-in-place kitchen renovations. Life is much easier and safer when an older adult isn’t trying to reach to the back of the pantry. The risk of them losing their balance in the process is way too high.
Today, I’m going to walk you through the installation of a pull out pantry for aging-in-place. With the right shelving, materials and guidance, you can start and wrap up this project in a day.
For more help installing a pull out pantry, check out these kitchen renovation guides!
Choosing Your Pantry’s Placement
 If you already have a pantry that you’re looking to convert to a pull out, you can pretty easily install a pull out shelving unit. If you don’t have a pantry, you can convert a tall floor cabinet into a pull out pantry using the same process.
Ideally, your pantry should be located close to your refrigerator and counter. If your current pantry isn’t close to your main work area and you have the option to relocate it, consider installing the pull out pantry in an easy-to-access area of the kitchen.
I recently wrote an article on “Reconfiguring the Kitchen Triangle” and the importance of a smart kitchen triangle configuration for aging-in-place. You can take a look at the article for some additional background on why the configuration of the kitchen is critical for aging-in-place safety.
Finding the Right Pull Out Pantry Unit for Your Aging in Place Kitchen
There are two specific features I look for in every pull out pantry that I install in an aging-in-place kitchen. The pantry must have a soft-gliding door and adjustable shelves.
Soft Glide Doors. These are a critical component of what makes a pull out pantry safe for an older adult. If the pantry door were to pull out too fast, or fly back into the cabinet too quickly and throw you off balance, there’s a serious risk of a fall.
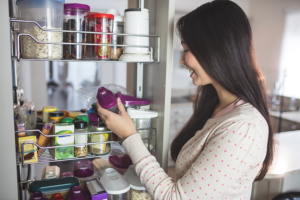
Adjustable Shelves. Smart aging-in-place design reduces or eliminates the need for an elderly adult to reach for anything – including food off of a tall pantry shelf. Adjustable shelves allow you to customize the shelving placement based on your parent’s height and level of mobility.
Here’s How to Install a Safe Pull Out Pantry for Your Aging-in-Place Kitchen
Tools and Materials You’ll Need:
The pantry you purchase should come with a set of wood screws, an Allen wrench and any other components your specific pantry requires in order for you to assemble its various parts as you do the installation.
Step 1: Determine Your Pantry’s Dimensions
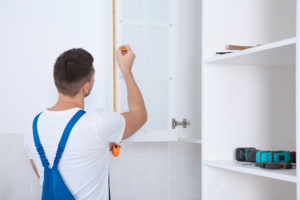 Unless your aging-in-place kitchen is a custom build, you most likely have stock cabinets. Stock cabinets come in one of many standard sizes with the most common cabinet widths being 12-inch and 15-inch. Determine your cabinet’s width using your tape measure. Do the same with the height and depth. Once you have these measurements, you can start shopping for a pull out pantry that will fit your cabinet.
Step 2: Choose the Best Pantry

Here are four high-quality Rev-A-Shelf pull out pantry units in a variety of sizes.
Rev-A-Shelf 12-inch Wide Cabinet Pantry
If you have a narrow pantry tucked into a 12-inch wide floor cabinet, Rev-A-Shelf makes a great pull out with enough shelf space for cans, cereal, pasta boxes and any other similar-sized items.
Rev-A-Shelf 15-inch Wide Cabinet Pantry
This unit fits a 15-inch pantry which is a more common size. It should fit taller items more comfortably and give the aging-in-place adult a lot of room to store food.
Rev-A-Shelf also makes non-standard width pull out pantry options:
Rev-A-Shelf 9-inch Wide Cabinet Pantry
Rev-A-Shelf 18-inch Wide Cabinet Pantry
Find the pull-out pantry that fits your cabinets and you’ll have a safe addition to your aging-in-place kitchen.
Step 3: Remove the Existing Cabinet Doors
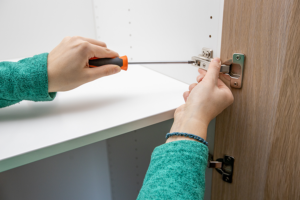 When you’re ready to get started with the installation, you’ll need to completely remove the pantry cabinet door and hinges. This will let you have enough space to work and reach the back of the cabinet for the install.
Step 4: Secure the Base Cabinet to the Wall
Before you go any further, check to see that the base cabinet you’re using for your new pantry is firmly secured to the wall. When you open the new pantry, there’s going to be a lot of weight towards the front and almost no weight at the back. This weight imbalance will put some serious wear and tear on your base cabinet if there’s any movement between the cabinet and the wall.
To give your base cabinet a bit more strength, add a few cabinet screws into the wall for additional support.
Pro Tip: When screwing in cabinets, go slow. Cabinets can easily split and using too much muscle and forcing the screw into the wall is asking for split wood – and an entirely new DIY project replacing your kitchen cabinets. You also need to use cabinet screws with a fine thread to better prevent the wood from splitting.
Step 5: Mark the Center of Your Cabinet and Lay Down the Installation Template

Step 6: Drill the Pilot Holes
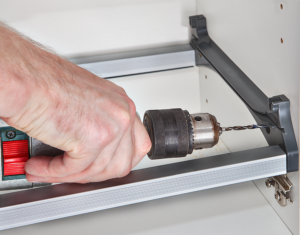 The template that’s now laying inside the cabinet is there to show you where to drill your pilot holes. Measure twice and cut once and when you’re confident that your template is lined up perfectly, go ahead and drill the pilot holes as marked.
Step 7: Attach the Pantry’s Bottom Slide
Align the pantry’s bottom slide over the pilot holes and attach it using wood screws. You should have a set of wood screws that came with your pantry. If not, check the materials list above to find the screws you need.
Step 8: Attach the Soft-Close Mechanism
 Any pull out pantry you purchase for an aging-in-place home should have what’s called a ‘soft-close’ mechanism. As I mentioned earlier, this is an absolute must. The soft-close mechanism keeps the pantry from slamming in or out of the cabinet which could cause multiple dangers to an older adult. A pull-out pantry for aging-in-place kitchens should open slowly and effortlessly. And it should close the same way.
Attach the soft-close mechanism at the back of the cabinet floor against the bottom slide. The pantry’s installation instructions should show you exactly where it goes and what hardware you need to properly secure it to the floor.
Step 9: Finish the Installation of the Bottom Slide and Give it A Test
Follow the manufacturer’s directions for finalizing the bottom section of the pantry.
Pro Tip: Before moving ahead, test the slide to make sure it moves back and forth and that the soft-close mechanism is working the way it should. You don’t want to get finished with the full installation and realize the pantry’s base isn’t working correctly.
Step 10: Mark the Center of The Top of the Cabinet and Set Up Your Top Slide Template
Now it’s time to work on the top of the cabinet to finish up the installation. Get your tape measure back out and measure the width of the top of the cabinet and mark the center line.

Pro Tip: Take your time here! You’re basically working upside-down when trying to get the top template in place. Go slow and do it right so your pull out pantry slides easily.
Step 11: Drill the Pilot Holes and Attach the Top Slide
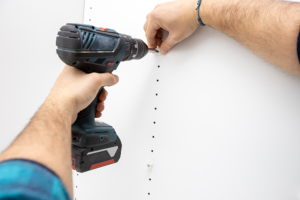 Just as you did on the floor of the cabinet, drill the pilot holes in the top of the cabinet per the template and manufacturer’s instructions. Then, align the top slide with the pilot holes and screw it in with your Phillip’s head screwdriver.
Step 12: Hook Up the Pantry Frame and Door Mounting Hardware
Next, find your pantry’s frame and secure it to the bottom slide. Then do the same thing with the frame and your top slide. Once the frame is secure, you can attach the door’s mounting hardware to the frame.
Step 13: Drill the Pilot Holes in Your Cabinet Door
Now the fun part. It’s time to fit the door to the mounting hardware and get the pantry door hung.
Mounting the door requires a little math to calculate your door overlay. This determines where you’ll drill your pilot holes.
 Start by measuring the width of the opening of the cabinet and the width of the door. Subtracting the width of the cabinet from the width of the door and dividing that number by two will give you your overlay on both sides of the door.
Then, mark your overlay distance on the back of the door. To determine the exact placement of the pilot hole, you’ll need to know how far down the door to place your screw so it sits securely in the door hardware slot.
To do this, measure the distance from the top of the cabinet opening to the door mounting hardware where the door and hardware will connect. The point of intersection where the length of the hardware and width of the overlay meet is where your pilot hole should sit. The number of pilot holes will be determined by the set-up of your mounting hardware.
Step 14: Set Screws in the Top Pilot Holes

Screw the door and hardware together using the screws attached to the door mount and secure the door in place.
Step 15: Install the Pantry Shelves
We’re almost done! Now that your door is mounted, grab your shelves and secure them to the frame. Set the shelves where stored food will be easy for your parent or loved one to reach. For aging-in-place pantries, I’ll sometimes ignore the top shelf settings altogether and keep everything towards the middle and bottom of the pantry just to be safe.
Step 16: Screw in the Rest of the Door Mount Brackets
You should have at least one more door mount bracket for the bottom of the pantry door. Attach it to the other pilot holes you drilled earlier and secure it in place.
Step 17: Enjoy Your New Pantry
That’s it. You’re ready to stock your new pantry with everything your parent needs and know that they no longer have to reach into the back of a dark cabinet and risk an injury.
Let’s Get Started
When you’re ready to take on this DIY project and find the perfect pull out pantry for your aging-in-place home, check out the pantries highlighted above and you won’t go wrong. As you tackle this installation, send me any questions you have using the comments section below.
Good luck with your next aging-in-place home renovation.