
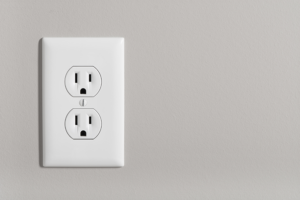
Removing the need to bend down low or reach up high is one of the pillars of smart aging-in-place design. Take a look around your home right now. Count the number of electrical outlets along the floor that you need to bend down to reach. Now, count the number of outlets at waist level. As I’m sure you already know, most residential outlets are found just above the floor creating a serious safety issue for older adults.
If this describes your home, raising electrical outlets should be high on your list of aging-in-place projects. Bending over to reach for an outlet is a potential fall hazard. And, if your parent falls as they’re plugging something into an outlet, you could have an even more dangerous situation.
The process of raising electrical outlets is fairly straightforward and inexpensive. But, because this is an electrical project there are extra precautions to take to make sure you stay safe and the work is done properly – more on that below. First, you need to have a good understanding of standard aging-in-place outlet requirements so the placement of outlets helps your parent stay safe and comfortable.
For more help raising electrical outlets, check out these DIY wiring guides!
ADA Requirements for Electrical Outlets
Most residential outlets are installed with the base of the outlet cover hitting 12-inches above the finished floor’s surface. You’ll need to raise each outlet by at least 3-inches to meet ADA standards. Higher if possible.
 The ADA puts a lot of emphasis on forward and side reach distance. In this case, the shorter the distance that you have to reach to get to the outlet, the better and safer that outlet is for aging-in-place living. The ADA mandates that all electrical outlets be placed within a safe reaching distance for an elderly adult. Here’s the fine print.
When a forward reach is unobstructed, the high reach can be a maximum of 48-inches and the low reach can be a minimum of 15-inches from the finished floor or ground.
The rules change if you’re looking at an outlet overtop of any obstruction, like a countertop.
For the purposes of this article, I’ll show you how to raise a wall outlet so it meets ADA standards and is safe for aging in place.
Place Your Outlets Where They Work Best for Your Parent
There’s no one-size-fits-all outlet height that’s best for aging adults. As long as you’re within the ADA’s threshold of 15-48-inches from the finished floor, you can pick anywhere in between that works best.
 If your parent is in a wheelchair or you want to plan for that possibility in the future, you’re going to want your outlets to hit the lower end of the height spectrum. This will make it easier for someone in a wheelchair to reach the outlet while sitting. If your parent is not in a wheelchair, place the outlets high enough to eliminate their need to bend over when plugging something in.
Before You Raise an Outlet You’ll Need to Do Some Homework
In practice, moving an electrical outlet up a few inches along the wall is a pretty simple DIY project. In reality, there are a lot of complexities with this job that can sabotage your success if you don’t know what to look for.
1. Electrical Codes & Permits
Many municipalities require a permit and inspection when you’re doing electrical work inside your home. Check with your local township to see what you need to do to comply with the rules before you get started.
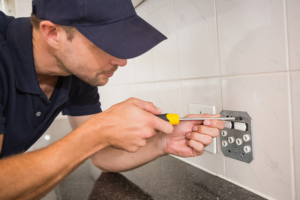
2. Consult a Professional
 If you’re a DIY novice or don’t have electrical work experience, you need to speak with a professional contractor or electrician before you start cutting through your drywall. Even if you decide to ultimately do the job yourself, take the time to learn the basics. I’ll get you started here and walk you through the process. Then, make sure you have an experienced professional by your side every step of the way as you raise each outlet.
How to Raise a Floor Outlet for Aging in Place
When you’re ready to get started, here’s what you’ll need.
Tools and Materials:
- Multimeter
- Pencil
- Carpenter’s Square
- Measuring Tape
- Stud Finder
- Oscillating Multi-Tool with Blade
- Phillips Head Screwdriver OR Electric Drill
- Caulk
- Drywall Mesh Tape
- Drywall Joint Compound
- Putty Knife
- Fine Grit Sandpaper
- Paint (that matches the existing wall)
Step 1: Turn Off the Power
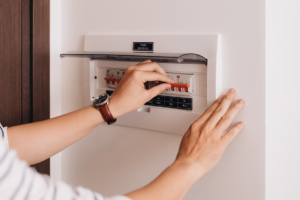 When you’re doing any type of electrical work, always turn off the power to the room you’re working in. Flip the breaker and then use your multimeter to double and triple-check that there is zero voltage flowing to the outlet you’re moving.
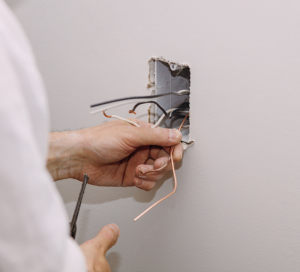
Step 2: Remove the Existing Outlet Cover Plate and Take a Look Inside
 The first step with this job is to get a lay of the land. Remove the outlet’s cover plate so you can see the exposed wires inside the outlet box. Coming directly out of the backside of the outlet receptacle should be a set of wires. Since we’re moving this outlet up higher along the wall, we want to see wires at the top of the receptacle heading up in the same direction.
If your outlet’s main wires head up, then you’re good to move on to step 2. However, if your main outlet wires are headed in the opposite direction that you want your outlet to go, your day just got a whole lot harder. Raising an outlet means raising the outlet wires as well. If you don’t have enough wire to move your outlet up, you’re looking at a more complex wiring project.
Pro Tip #1: If your outlet’s main wires are headed in the wrong direction, it’s time to call a professional contractor. This type of project requires professional experience and a thorough understanding of code standards so the work is done well and your home is safe.
Step 3: Mark the Wall Where the New Outlet Will Go
Figure out where you’d like to place the new outlet. Then, mark a horizontal line on the wall where the top of the outlet cover will eventually sit. Next, you’re going to draw two vertical lines – one from each side of the existing outlet – up until they intersect with the horizontal line you just drew. Use your square measuring tool to make sure your new outlet will be in line with your existing outlet.
Step 4: Find the Stud
One side of your existing outlet is attached to a stud. The question is which one. Use your stud finder to locate the stud closest to your outlet before you start cutting through the drywall.
Step 5: Cut Through the Drywall
Once you find the stud, you’re ready to cut through the drywall and create space for the new outlet. Cut along the vertical lines you marked in step 2.
Pro Tip #2: When cutting along the stud side of the outlet, start by placing your saw blade slightly to the inside of the line you drew – 1/8-inch or so should do it. This will help make sure you don’t end up cutting into the stud. You can always go back and cut through more of the drywall if needed.
Step 6: Cut Any Extra Drywall to Expose the Outlet Bracket
 Once you’ve removed the drywall on either side of the existing outlet, you should be able to see a bracket connecting the outlet box to the stud. Keep removing the drywall until the bracket is fully exposed.
Step 7: Move the Outlet Box Up and Secure it Into Place
Unscrew the bracket attaching the outlet box to the stud. Once it’s freed, slide the outlet box up and into place at its new height. You’ll then re-screw the bracket into the stud to hold it in place.
Step 8: Patch the Drywall
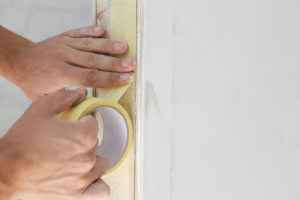 Now that the outlet is in place and at proper aging-in-place height, you’re ready to patch the drywall. You can re-use the drywall you cut out of the wall if it’s somewhat intact. Or, purchase a new piece of drywall and cut it down to fit the size of the hole you need to fill.
I like to use mesh drywall tape to patch along the seams. Just place your new piece of drywall over the hole in the wall and connect it to the wall with the mesh tape.
Once the tape is in place, you can apply a thin layer of drywall compound to patch the wall. I like to start with a thin layer first and let that dry. Then, I add a second layer. You may need up to three layers to create a smooth surface and hide the texture of the mesh tape.
Step 9: Sand and Paint
Now, all that’s left is to lightly sand the area and paint over it so it matches the rest of the wall.
Find the Best Outlet Height for Your Parent. Then, Get to Work.
With the basics of raising an electrical outlet under your belt, it’s time to get to work. Talk with your parent and work together to figure out the best outlet height throughout their home. Then get in touch with a professional contractor who can help you do the job safely and to code.
As you plan this and the rest of your aging-in-place projects, send any questions my way using the comments section below. Good luck with your next aging-in-place home project!