
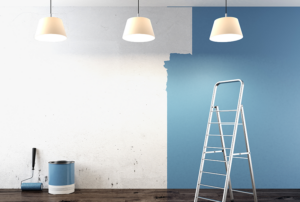
Painting may very well be the most popular home DIY project. It’s relatively easy, doesn’t break the bank, and it’s a job you can usually finish in a weekend or two. For the aging-in-place home, updating the color on the walls can provide a lot of benefits.
Why Does Paint Matter When You’re Upgrading a Home for Aging-in-Place?
Practically speaking, if you’re making upgrades throughout your home, painting is pretty unavoidable. As you tackle other aging-in-place renovations, like widening doorways or installing non-slip flooring, you’re going to need to touch up or repaint walls once those larger projects are done.
A fresh coat of paint offers a lot of other benefits, too. If your parent’s home is lined with old wallpaper or full of dingy walls that haven’t been painted in decades, giving each wall a new coat of paint and bringing some color back into the home can have huge emotional benefits and make the home a happier place to be. All good things as we make an older adult feel more comfortable in their own home.
How to Choose the Right Color for Aging in Place
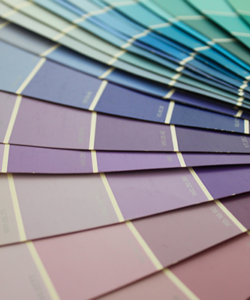
The first step of a painting project is the hardest – deciding on the right color. My color pro tip for all aging-in-place homes is to choose a high-contrast color. High-contrast walls can be a huge help for seniors as things like eye-sight and color distinction become more difficult.
You can read more on high-contrast paint colors in my recent article, “Tips for Applying High-Contrast Paint to Walls to Make Your Home Age-in-Place Friendly.”
My Top 10 Pro Painting Tips
Painting is one of the easiest home DIY projects. But, it’s also easy to make a mess of your walls if you don’t take your time and do the job right. To help you through the project, take a look at my top 10 pro painting tips before you break out the brush.
Here are the Tools & Materials You’ll Need for Most Home Painting Projects
- Putty Knife
- Joint Compound
- Light Grit Sandpaper
- Sponge
- 2” Cut-in Angled Brush
- Paint Roller
- Roller Frame
- Roller Extension Pole
- 5-gallon Bucket with Lid
- Handheld Paint Bucket
- Rolling Tray
- Rolling Tray Liner
- Step Ladder
- Canvas Drop Cloth
- Painter’s Tape
- High-Quality Interior Paint
- High-Quality Interior Primer
Pro Tip #1: Don’t Skimp on The Prep Work
It’s tempting to break out the roller, pry open the paint can and immediately start throwing paint on the walls. Resist that urge and take the time to prep your walls before you start painting. If you don’t, you’ll likely have peeling, discoloration or an uneven paint texture staring back at you.
Start your paint project by removing any nails or screws in the walls and filling the holes with putty or joint compound. Remove light switch covers and cover anything you don’t want splatters of paint to hit. And, lay down drop cloths to cover your floors.

Next, lightly sand or scrape any flaking or peeling paint already on the walls. If your walls have cracks in the plaster, you’ll need to fill those with a strong plaster putty and sand the patched wall once it dries. When you’re done, wipe each wall down with a damp rag or sponge and you’re ready to go.
Pro Tip #2: Buy Quality Paint

This may be the most important tip of them all. The quality of your paint project depends on the quality of the paint you use. When it comes to paint, you absolutely get what you pay for. If you have a minimal DIY budget, find savings in other areas and invest in quality paint. Good paint is easier to work with, rolls on smoothly and looks better once you’re done.
Good quality brushes and rollers are also worth the extra money. Applying a nice paint with a bad brush or roller can leave streaks in the paint and lead to an uneven paint coating. I use a 2-inch angled brush to do all of my trim and edges. The angled bristles help create a straight line against each edge so I can get a better paint line.
Pro Tip #3: Paint the Ceiling
I know you were hoping to skip this step. Don’t! Painting the ceiling will make a huge difference in the final look of your room and is well worth the extra effort.
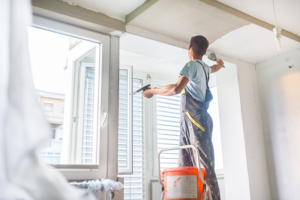
Start by placing your painter’s tape along the top of the wall. Use your brush and paint around the edge of the ceiling closest to the wall where you placed your tape. This is called ‘cutting-in’, and it will help reduce the likelihood of getting your ceiling paint on the walls.
Once you’ve cut-in, use your roller to roll the paint onto the ceiling. Use a ladder if you need to – an 8-ft ladder is usually enough in most homes – or a roller extension rod. You want to be able to comfortably reach the entire ceiling so your paint is evenly applied.
Pro Tip #4: Use a Putty Knife to Put Painter’s Tape in its Place

Place painter’s tape on all of your surrounding trim. Once the tape is where it needs to be, run your putty knife along the edge to make sure you have a tight seal between the tape and the corner of the wall. Nothing is more frustrating than peeling off the tape once your wall is done and realizing paint has seeped under the tape onto your trim.

When you use painter’s tape, read the instructions and know how long you can leave the tape on the walls or trim. If some tapes are left on too long, they can be difficult to remove.
Pro Tip #5: Use Primer
Using a primer on the walls under your paint is another important step in the process. If your walls are textured, painted a dark color, or haven’t been painted in who knows how long, a primer will help cover up imperfections so the new paint job looks great.
You can find paints with a primer baked in. These will work if you have clean, light-colored walls that are in good shape. For anything else, take the time to prime. You won’t be sorry you did.
Pro Tip #6: Paint Each Wall from Start to Finish
When most DIYers start painting, they tend to cut-in on each wall first, then go back and paint each wall. My advice is to paint one wall from start to finish – cut-in then immediately roll. This is the best way to get a seamless look and have the brushed paint in the corners blend with the paint you just rolled on. Once your first wall is completely painted, paint the second wall.
Pro Tip #7: Boxing

You’ll always have slight differences in color from one paint can to another. Pros know the trick of ‘boxing’ paint to avoid color inconsistencies. To box your paint, just pour each paint can into a 5-gallon bucket and stir. Transfer the paint to a small, hand-held paint bucket when you’re using a brush and a rolling tray when you’re rolling. If you take a break, just cover the bucket with a lid or wet rag and the paint will sit well while you’re gone.
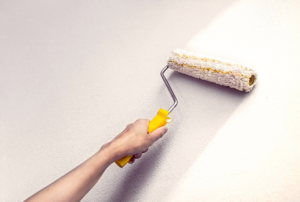
Pro Tip #8: Roll from Top to Bottom

There’s a right way and a wrong way to roll. A smooth, even paint application is one of the keys to a well-painted wall. Pro painters know that the best roller method is to start at the top of the wall near the ceiling and roll your way down.
As you roll, don’t soak the wall with paint. Do a few passes with the roller until the wall is covered and the color is even. Then move on to the next section. Once paint beings to dry on the wall, leave it alone and handle any minor touch-ups with the second coat.
Pro Tip #9: Apply a Second Coat
It’s yet another step to add to the process but a second coat of paint will make all of the difference in the final look of your walls. Only one coat of even the highest-quality paint will show uneven coloration and spots you missed the first time around.
Pro Tip #10: Wrap Up Rollers Between Painting Sessions
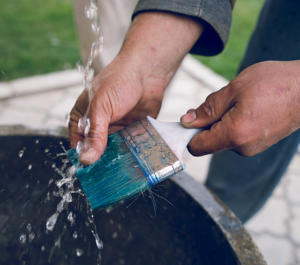
If your paint job takes a few nights to complete, an easy trick to keep rollers from drying out is to wrap them in a plastic grocery bag. When you’re done for the night, soak your roller in paint and cover it in the bag. This will create an air-tight seal and keep the roller from getting dried out. It’ll be ready for you when you’re back the next day to paint some more. If you’re re-using a brush the next day, though, wash it with cold water and remove the wet paint then let it dry.
Time to Get Painting
With these tips under your belt, you’re ready to paint like a pro and get the walls in your aging-in-place home looking great for your parent or loved on. If you have any questions as you paint, use the comments section below and I’ll be happy to help. And, good luck on your next aging-in-place DIY project.